Installation
Updated on 02.10.2024
In this guide

1. INTRODUCTION
- Adjustment Knob
- Switching Knob
- Locking Ring
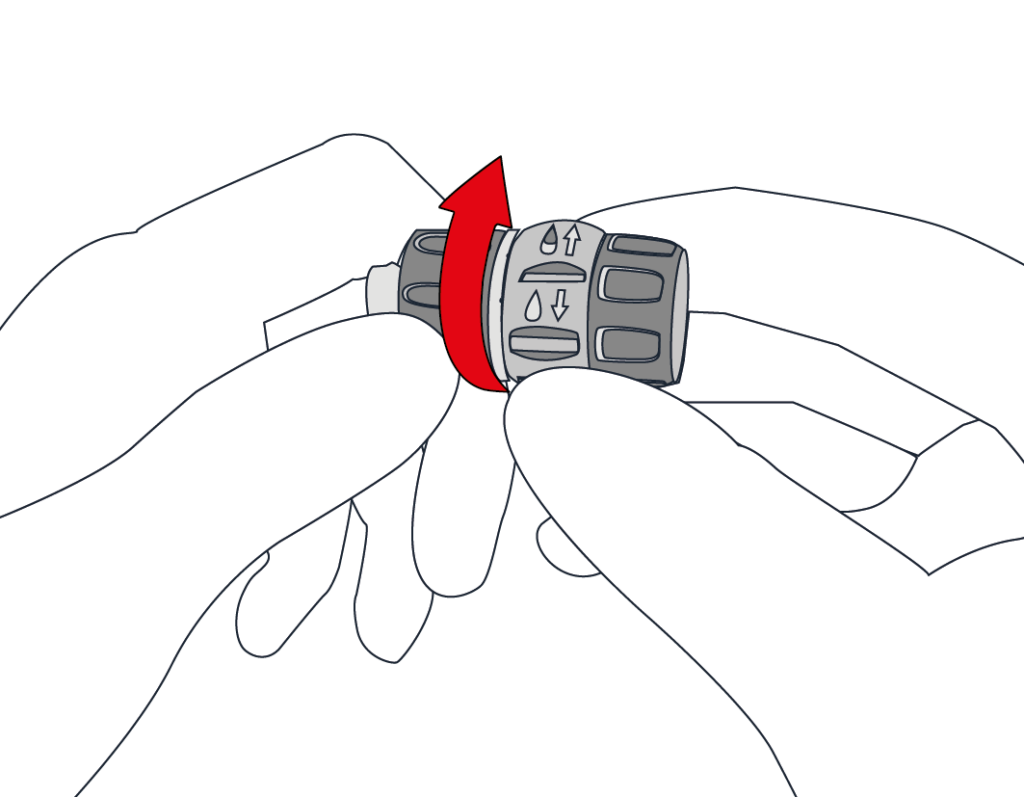
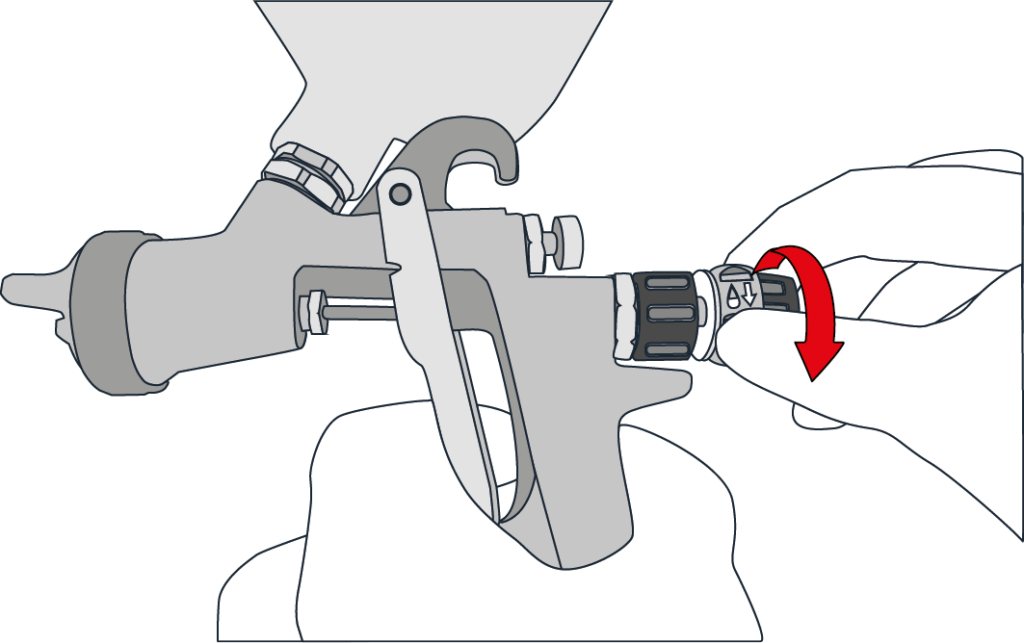
2. TURN THE SWITCHING KNOB
Before starting with installation, turn the switching knob clockwise and make sure that it is in its reduced position.
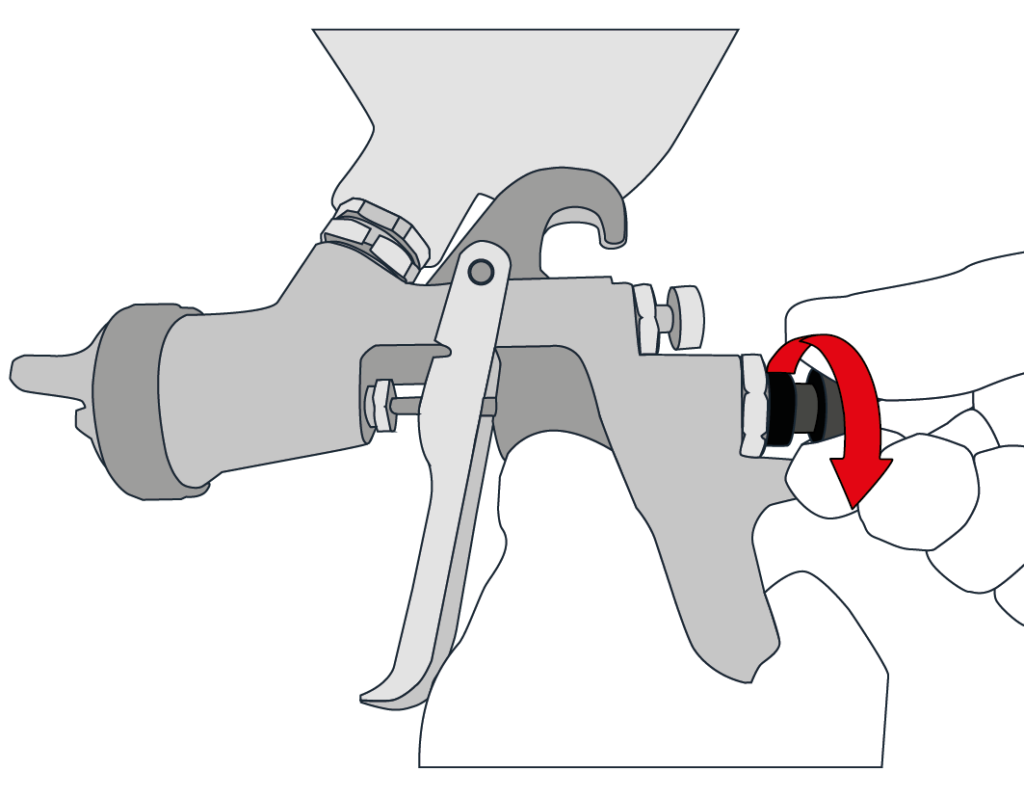
3. UNSCREW THE FLUID KNOB
First unscrew the standard fluid knob.

4. DISASSEMBLE THE FLUID KNOB
Disassemble the standard fluid knob leaving the needle spring already assembled in its seat.
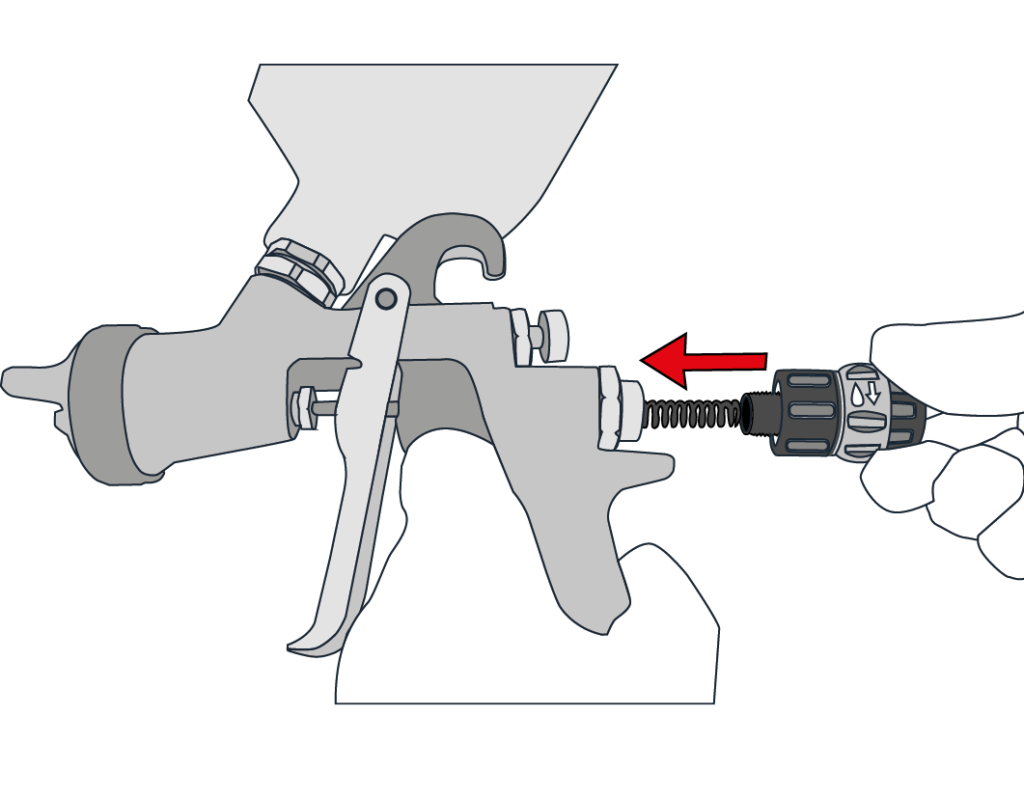
5. INSTALL THE QFA
Replace the standard fluid knob with the QFA (Quick Fluid Adjuster). Make sure that the needle spring remains in its position and fit the QFA on it.
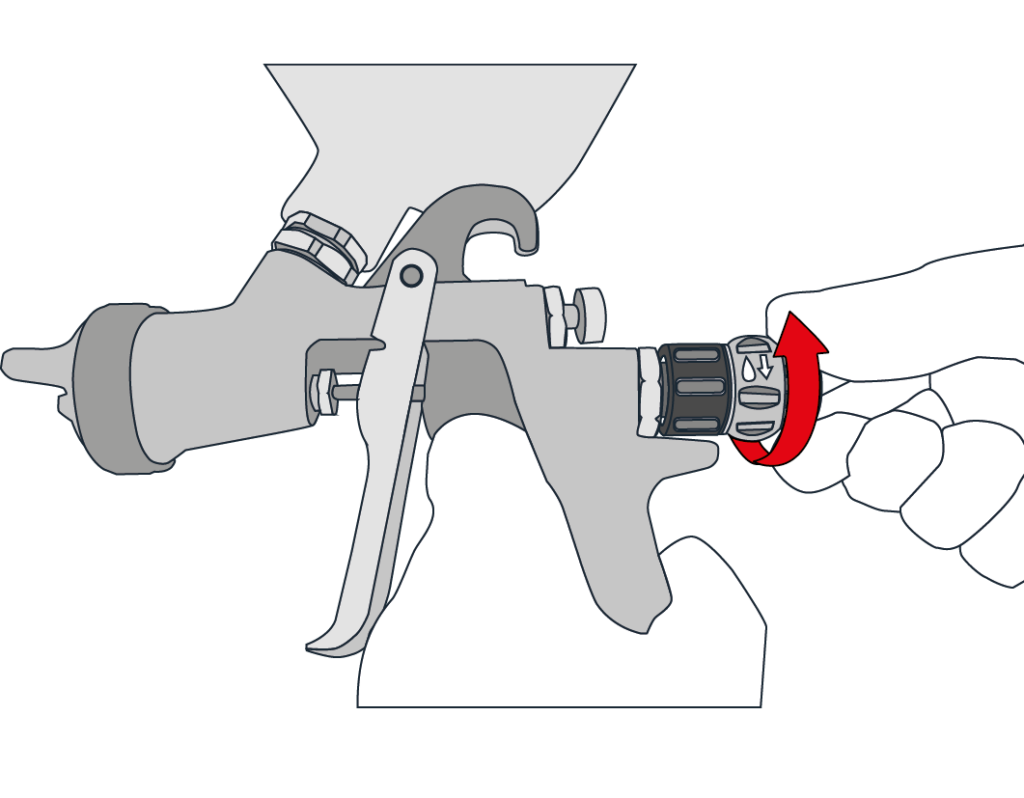
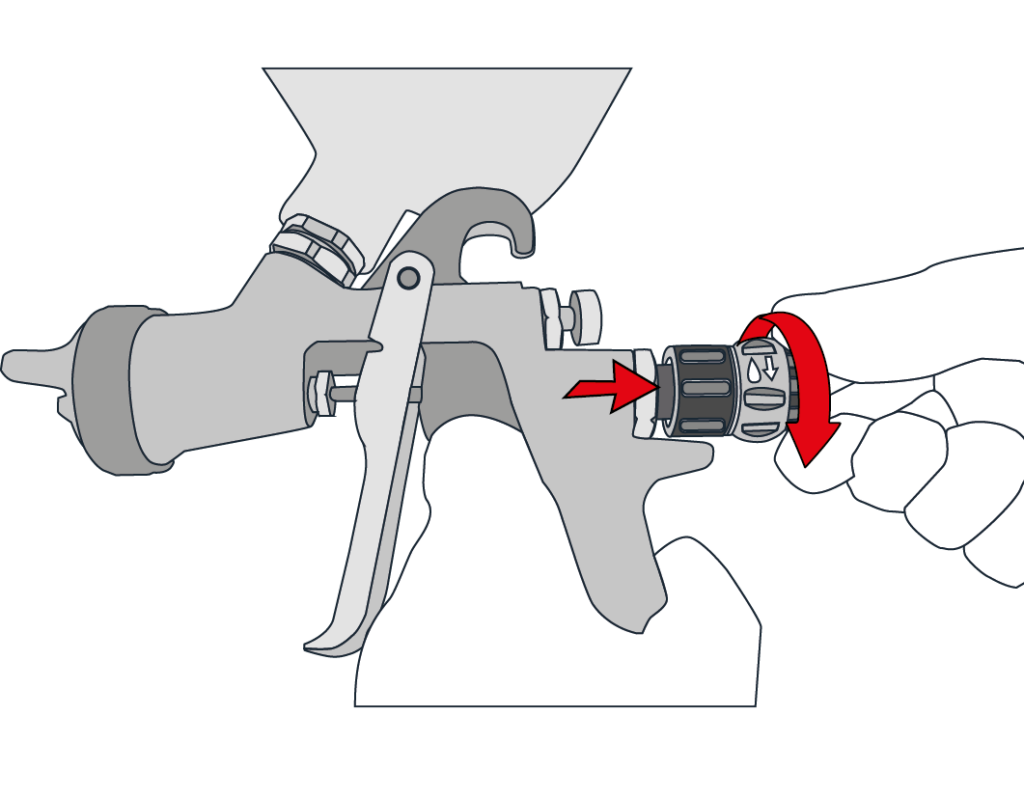
6. ASSEMBLE THE QFA
Again make sure the QFA is in its reduced delivery setting, then assemble it on the gun body by turning the adj. knob, clockwise until the end of its complete close.
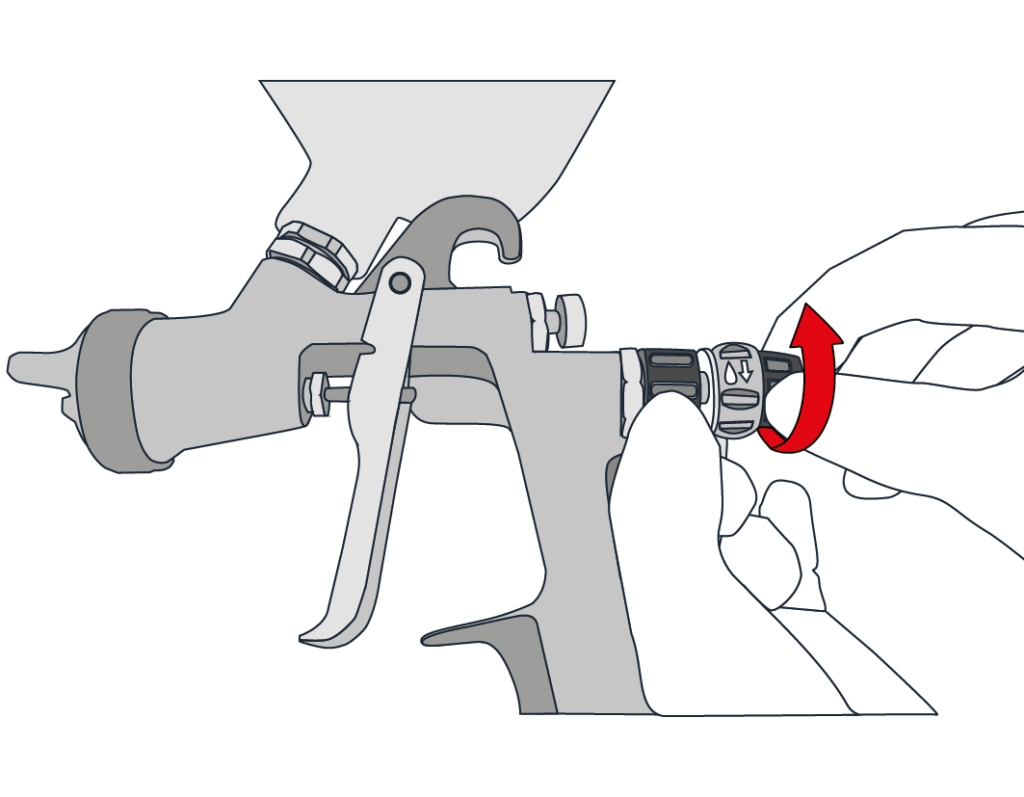
7. TURN THE QFA
Once it stops, turn the QFA out again as needed by turn the fluid adj. knob out 2 full rotations.
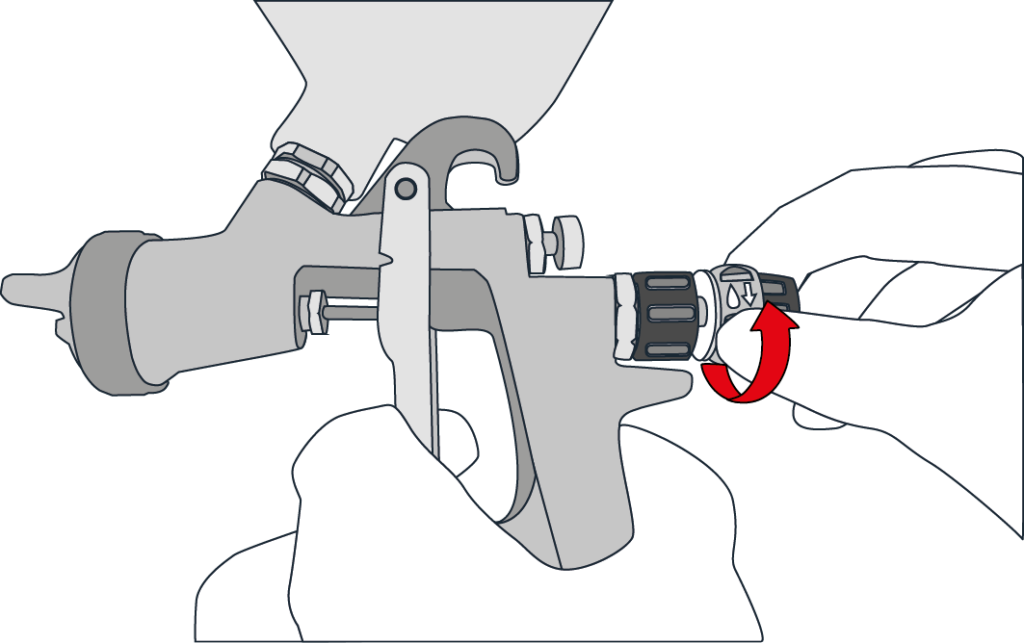
8. LOCK THE QFA
Once done, lock the QFA in its position by using only the locking knob. Turn the locking knob clockwise until the end of the its run.
9. CLOCKWISE REDUCES FLOW
That is all there is to do. Now you can switch between the modes by turning the switching knob clockwise or counter-clockwise. Turned clockwise the fluid delivery is reduced.
10. COUNTER-CLOCKWISE FOR FULL FLOW
Turned counter – clockwise the fluid delivery is fully open.